I know, I know, you want perfect sourdough bread. So do I. So does everybody! We could sing its praises all day – but we don’t need to – because you already know, that’s why you are here!
In all the comments on all the message boards in all the Facebook baking groups out there, there are two constant themes: “What’s your secret?” and “There are too many variables!”
The secret lies in what is above all the variables, the SOURCE of all the variables, if you will – the dough itself.
Note: This page contains Affiliate Links. If you click on any of the items and make a purchase, our family will receive a small commission at no extra cost to you. I will only ever link items I use or would buy for myself after thorough research. Thank you for your support! Happy Baking!
The Biggest Secret to Perfect Sourdough Bread is GET TO KNOW YOUR DOUGH
So, I am here to introduce you.
Hello, friend. Meet Perfect Dough.
Perfect Dough, meet my friend.
Before making your dough:
Flour:
Any flour works, but I always recommend that beginners start with high quality, unbleached bread flour. If you want to experiment with other flours, you may want to master your technique with standard white first (or at least use at least 60-75% regular bread flour) to make sure you get the results you are looking for from the get go.
Water:
Make sure your water is not chlorinated – if you don’t know if it is or not you can leave it out in a pitcher overnight and all the chlorine will evaporate – or you can use bottled water.
Expectations:
You might be making amazing bread already and you just don’t know it because your expectations are too high.
Keep in mind when drooling over someone else’s pictures:
- Wild yeast breads will never rise the same way as commercially yeasted breads do.
- Just because someone takes a super amazing closeup crumb shot of their bread, does not mean that it is bigger than yours. Even closeups of tiny things look big.
- Also, someone could simply be making a larger loaf (ie. more flour, more water)… duh, it’s going to look bigger than yours.
Everything is about perspective. I have baked bread before that looked amazing in the pots but tiny as soon as I took it out. It often looks flat until you cut it, and then, voilà, it looks professional. Photo angles do amazing things to reality 🙂

So, don’t doc yourself too many points. We are always our own worst critics.
Have fun with this. Enjoy the process.
Relax, and get to know your dough!
*Note* The dough I describe here is 75% hydration dough, but the pointers work for all hydration levels. Also, I chose to describe a method that requires the least hands on time and produces the same stages and the same, or better, results than many other processes out there (ie. the methods that require S&Fs every 1/2 hour, etc).
What to look for in your Perfect Dough
First Stage: Mix
All you need to do here is make sure all your ingredients are in and that the flour is all wet. It should be “shaggy” not smooth.


Rest (30 min – 2 hours)
Rest (covered) until the dough is nice and relaxed – you will know this because when you first mixed the dough you had a more “ball shaped” mass, and when it is relaxed, it will be more “flat with the bowl” (no rise in the center, and touching all the sides of the bowl). It’s ok that the dough looks a little “lumpy” still – it won’t smooth out until you start to stretch it. Compare this stage to the more ball shaped picture in the mix stage.


Second Stage: S&Fs
1st Stretch and Fold
When the dough is relaxed it should be easy to grab and stretch – along the lines of a loose putty or “Slime” (you know, that stuff all the kids make now days with glue and contact solution?).
This will be more obvious if your dough is 75% hydration or higher.

You should begin your S&Fs BEFORE the dough begins visibly rising. It should not feel puffy at all.
Wet hands and Stretch and Fold going around the bowl 12-24 times until the dough forms a taut, relatively smooth ball (Stop when dough feels like it might rip instead of stretching).

Cover and rest: (1-2hours)
Dough is not ready if it still looks like it is “unfolding” from the last S&F.
Dough IS ready when it is relatively flat again in the bowl (relaxed, not ball shaped). There might be 1-2 little bubbles starting to show up, but no real rise yet.

2nd S&F
Repeat the first S&F process going around the bowl until dough forms another taut, very smooth ball – Again, go until you feel like if you go any more you will rip the dough (should be about 10-12 stretches this time).


3rd Stage: Now you have to make a choice:
I know – so many choices.
Check the post on “What’s my baking style?” to find out what method would work best for you – or just ask yourself, what time of day is it?
If it is evening, or you need to put the whole process on autopilot for 8-12 hours: Choose method 1. (Be careful of overproofing with this method if you are making a single loaf with less than 375 grams of flour).
If it is morning, and you have a day at home: Choose Method 2.
Method # 1 –
Cover and rest for cool Bulk Proof – could take anywhere from 6-12-48 hours depending on temperature and quantity of starter used.

You can do this overnight if you have a cool place to do it (48-65 degrees) – sometimes I will put mine a cooler with some ice (because it’s not as cold as the refrigerator), or in the wintertime you can do it on the kitchen counter. In the springtime/early summer/late fall I will even just put it outside with a plate over the top.
If you put it in the refrigerator, depending on how active your starter was and how much it started rising at room temperature, it could slow down the rise process for up to 3 days (which is great if you really want to make this ahead of time). Just check on it every so often to see if it is starting to get really bubbly (use a clear bowl so you can see underneath).


Bowl full of bubbles!
*Note* This is the method preferred by the popular Foodbod Sourdough and it works beautifully. However, if you aren’t careful, it is relatively easy to overproof your dough using this method. Be sure to read my article on How to Avoid Overproofing your Dough, if you are worried about this or seem to be having trouble with this method.
Form Loaf – (6-12 hours later)
After you wake up (or get home from work) – your bulk proof should be completed. Your dough should be super bubbly and happy.
If your dough is very cold, it might be a little stiff and need to come to room temp before it will be cooperative enough for you to form the loaf.
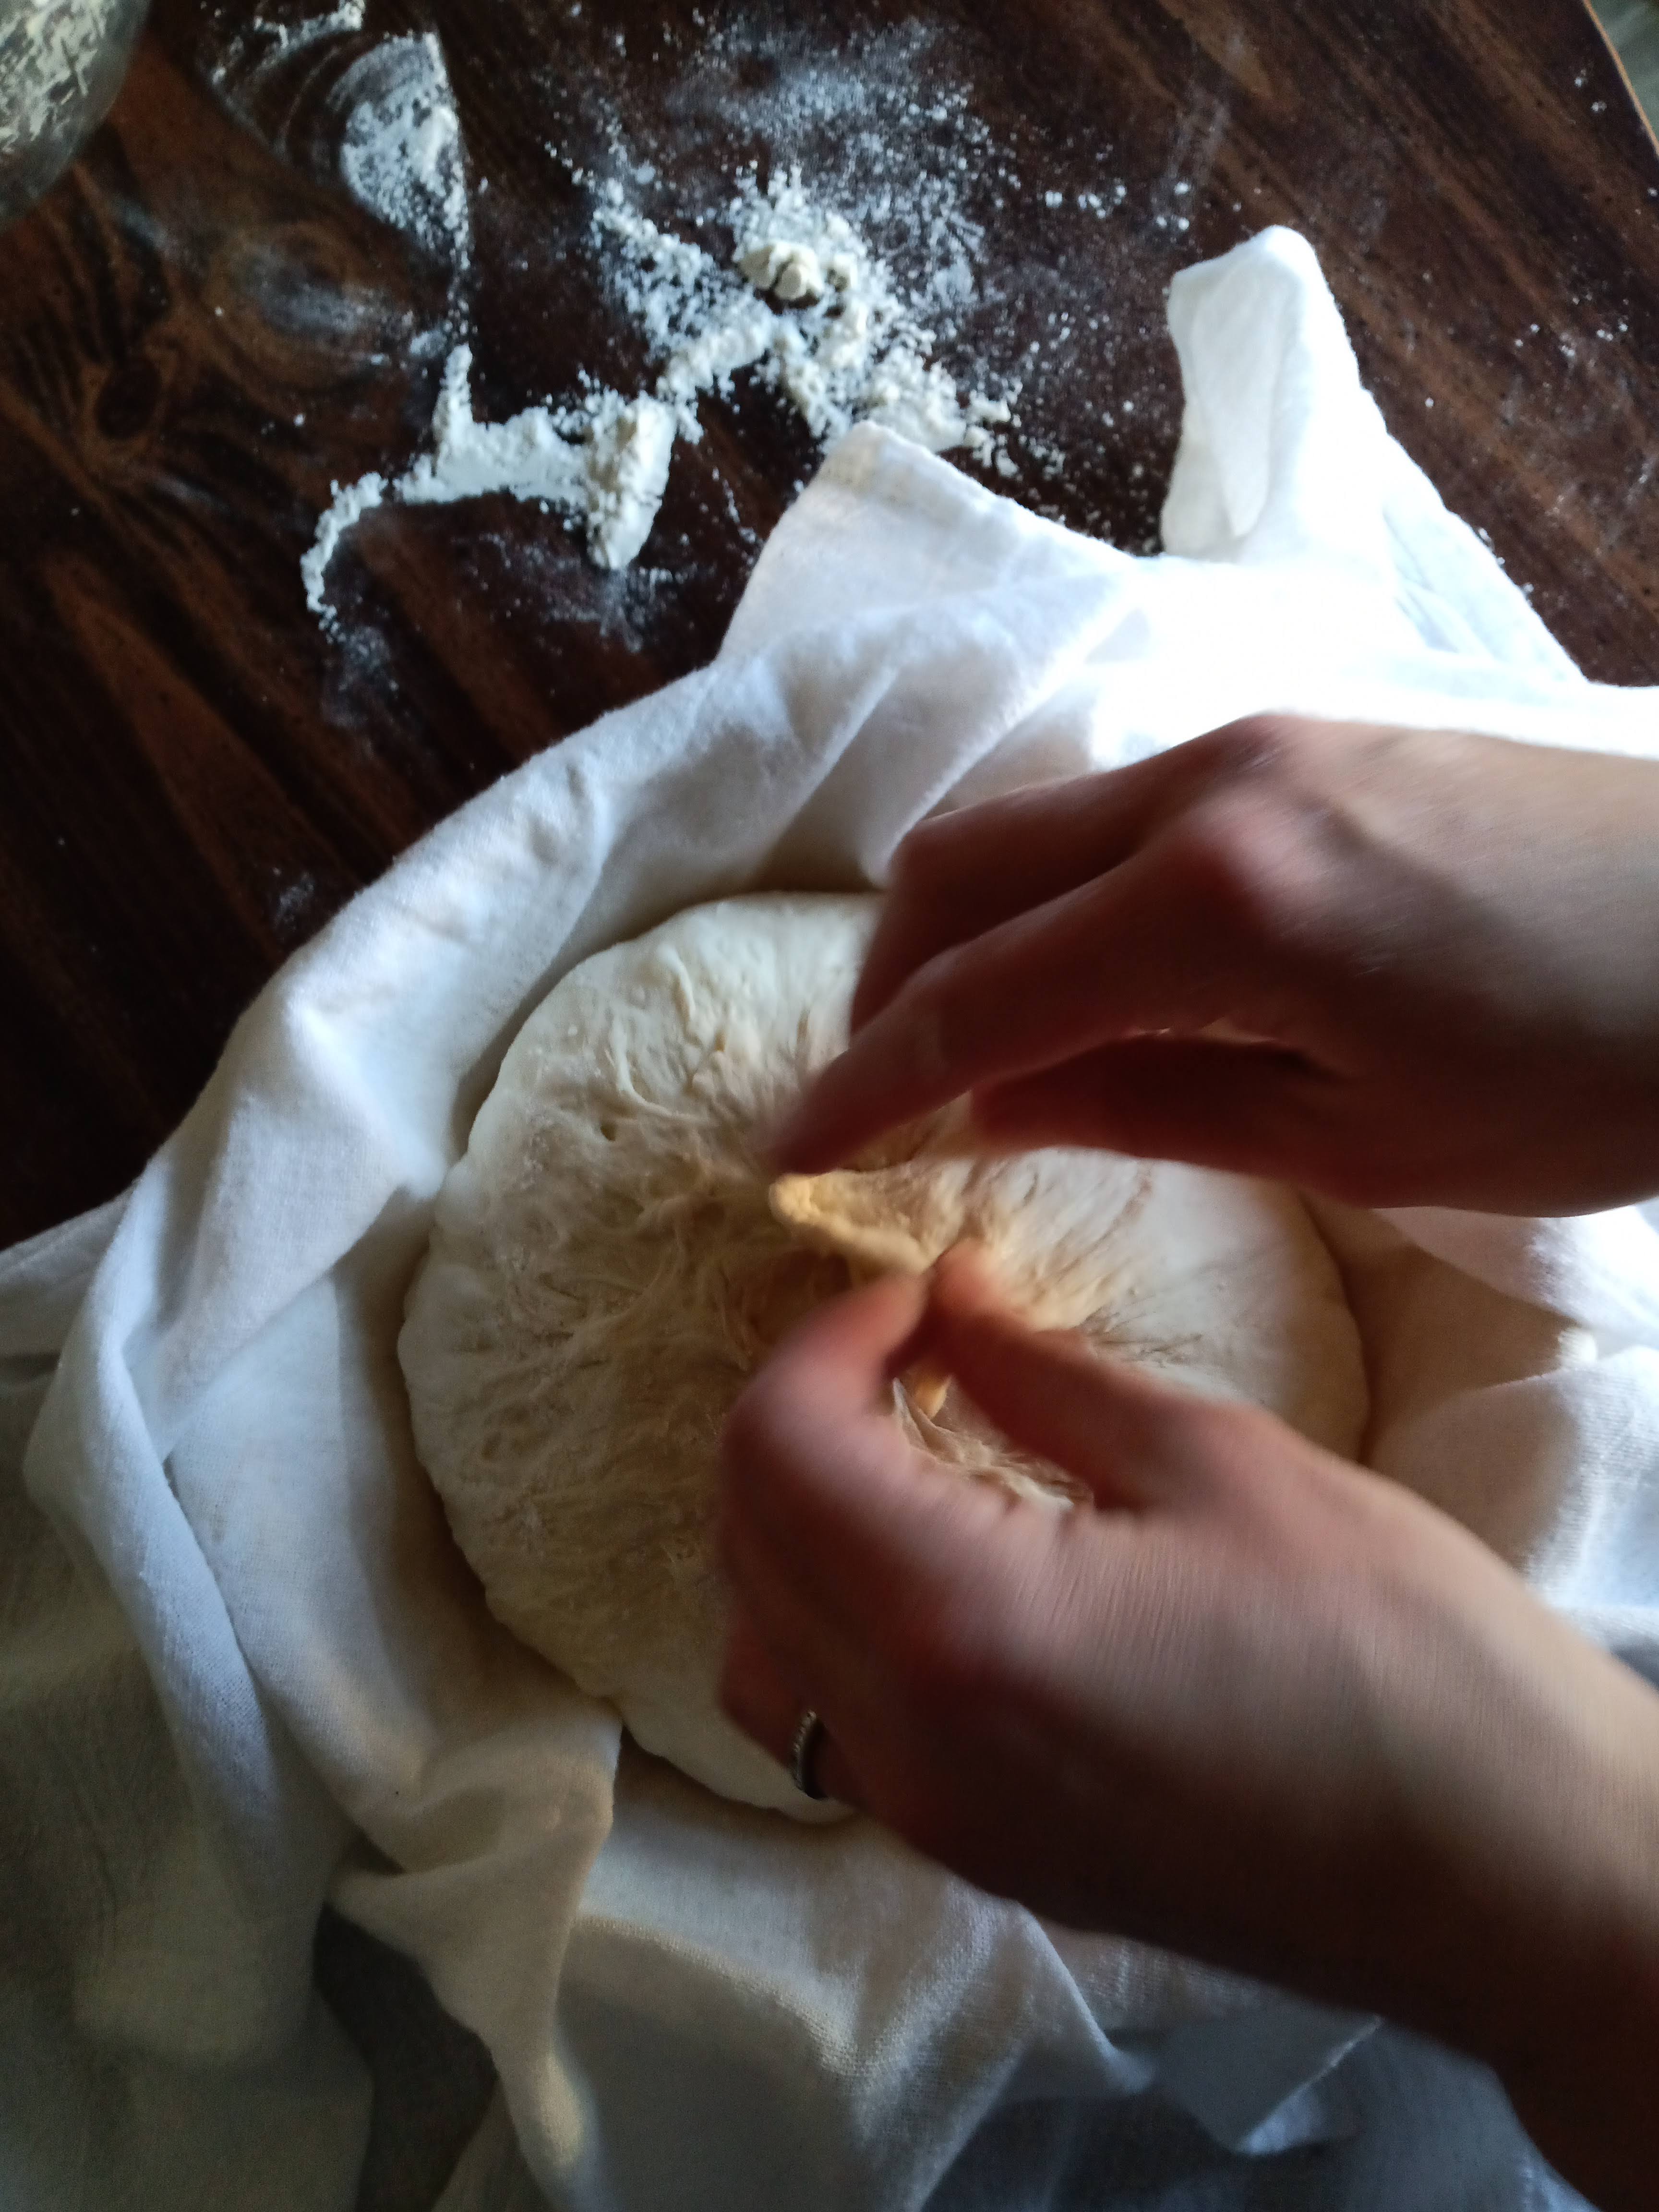
Once it doesn’t resist you when you try to give it a good stretch and fold (it might be a little stuck to the edge of your bowl so use a wet dough scraper to get around the edges), you can gather the dough gently back into a loose ball (no more than 8-12 gentle S&Fs) and let dough gently fall out onto lightly floured surface (keeping all your seams up). This step is often called the “Preshape”.


Allow to rest for a few minutes to relax (10-15).
Wash the bowl or something while you wait 😉
Then, gently preform one last set of S&Fs (about 4-6) just to tuck all the sticky sides in and together, bringing the dough one last time into a relatively taut ball. Lightly floured side should now be on the outside and the sticky side should all be tucked in.
Flip the ball of dough over and cup your hands around the dough, rotating it and using your hands and the countertop to gently bring all the seams together for a smooth, lightly dusted finish. If you have ever heard the saying “soft as a baby’s bottom”, this is it! It feels exactly like a baby’s nice, clean, lightly powdered, perfect little bum.
At this point, your loaf can be placed, seam side up, into your floured proofing towel (use rice flour) or banneton and placed in the refrigerator until ready to bake (3-8 hours).
Or if you are really in a hurry, you can just let it rest for 1-2 hours room temp before baking (hot – Also called the “Tartine method“).

For more info: See article on the Perfect Bake!
Method #2 – Cover and rest (still at room temp) for another 3-6 hours
(See images from previous method)
Choose this route if you are home or awake for another couple hours. It is the most stable, least likely to overproof, and the method preferred by most professional bakers. The only downside is that you need to be around a few hours later for it – as opposed to overnight.
At this point your dough has been out for about 6-7 hours and should start showing obvious signs of rising (nearly doubled in bulk).
For your first 2 stretch and folds, when you grabbed to pull the dough, the center should have diminished as the dough was pulled outward, but this time, it should be a little puffy in the center and even the edges, when you grab them, should feel a bit more “voluminous”.
If you grab one side and stretch it out and back over the center, you should see little air bubbles trapped in the surface of the dough.
Once you know the dough is ready, you can dump it out of your bowl onto a lightly floured surface and let it rest for another 10-20min (it should still be sticky on top). As the dough rests, it should get really soft and pliable and feel slightly puffy to the touch.
Form your loaf
After the dough rests on the counter for a few minutes you can preform one last set of S&Fs (about 4-6) to bring the dough one last time into a relatively taught ball – working gently. Lightly floured side should now be on the outside and the sticky side should all be tucked in.
Flip the ball of dough over and cup your hands around the dough, rotating it and using your hands and the countertop to gently bring all the seams together for a smooth, lightly dusted finish. If you have ever heard the saying “soft as a baby’s bottom”, this is it! It feels exactly like a baby’s nice, lightly powdered, perfect little bum.
At this point, your loaf can be placed, seam side up, into your floured proofing towel or banneton and placed in the refrigerator until ready to bake (overnight to up to 24 hours).


Next See Article on the Perfect Bake.
Listen to your dough!
For perfect sourdough bread then, the key, above all the other variables, is to listen to the dough. Touch the dough, feel the dough.
It doesn’t necessarily matter how long it takes or what recipe you use, what temperature your kitchen is, what kind of flour you used, or how much starter you had. All the fancy terminology is not necessary. Even when you add the salt or the starter doesn’t make much difference.
All of the combos will give you the exact same stages and Critical elements for Successful Sourdough.
The most important thing is to get to know your dough!
Yeast is alive. Your dough has a voice! It WILL totally tell you what to do and when to do it if you learn how to Listen!

____________________________________________
For more info on dough variables, read this article:
And be sure to check out the links to my favorite Sourdough Baking Supplies!
#slowfood #mybakingstyle #myfoodmyway #addictedtosourdough
___________________
Question of the day: Do you know your dough?
What is your favorite “personality trait” of your dough?
Mine is the warm, tight puffy-ness of the perfectly formed final proof that feels just like a baby’s bottom (Sorry, I can’t help myself… I have too many babies!). You can just tell that the dough can’t wait to spring out! (and who doesn’t love oven spring?!?)
Other ideas: The smoothness of those first S&Fs, the way the dough relaxes like real live magic, the fact that it practically makes itself over time, the fact that each loaf always has its own flavor, watching your starter rise and fall, naming your starter, etc…
2 responses to “Know your dough – The Secret to Perfect Sourdough Bread”
Thanx, very informative!
Glad I could help!