There are so many sourdough FAQs! This article is designed to help you sort them out 🙂
Note: This page contains Affiliate Links. If you click on any of the items and make a purchase, our family will receive a small commission at no extra cost to you. I will only ever link items I use or would buy for myself after thorough research. Thank you for your support! Happy Baking!
Top 10 Sourdough FAQs
*Quick Note* – These questions are in no particular order. Maybe in the comments you should let me know if I should revise the post and prioritize certain questions over others. 🙂
#1 – I’m a newbie, what are the best resources for getting started?
Well, ideally, this blog is meant to be a good place to come 🙂 Do you need help picking a recipe or deciding your style?
If you just want to make your first loaf, I highly recommend www.foodbodsourdough.com even though I personally prefer a much higher hydration loaf than the one she uses. But, lower hydration loaves are good for beginners and her method is pretty foolproof and simple. You can work up to other recipes later if you want.
I also love the Clever Carrot – even though Emilie also uses a much lower hydration level than I prefer.
Or, you can also get My Master Recipe HERE – (Coming Soon!).
#2 – I’m overwhelmed by the wealth of information out there. How do I know which method or resources are best for ME?
In order to know the answer to this question, you need to decide your:
- Goal (ie. Edible bread, Hands off Bread, Perfect bread, Bread Scientist, or switching to “All Things Sourdough”)
- Commitment Level – usually depends on your time availability / busyness (ie. “All in”, “Every So Often”, or “Just want to say I did it”)
- Style (ie. Hands off, hands on, professional, faithful, occasional, hobby, etc)
Find your Perfect Method Here.
#3 – How can I get more sour loaves?
It’s called SOURDOUGH, yet most people are shocked that it doesn’t -necessarily- taste very sour! This is great for people who love to make cinnamon rolls and bread pudding, or who think they don’t like sourdough bread, but not so much for the people who appreciate the bread for its depth and complexity of flavor.
The short answer: TIME
The longer you proof your loaves, the more sour they become (but be careful of overproofing). For complex flavors, many comfortable, seasoned baker’s prefer a long bulk ferment (up to 72 hours) at cold temperatures.
Other suggestions:
- Add rye or whole grain flours to your starter
- Be sure to follow starter feeding ratio guidelines (1:1:1 – Starter:Flour:Water) – Larger feedings start to drown out that built up flavor
- Use more starter in your dough (but be careful, it will rise faster and affect hydration levels – you might need to calculate more and watch it carefully)
- “Starve” your starter for a few days at room temperature until it begins to separate. A brownish, very soury, liquid called “hooch” will begin to form on the top. Just stir it back in and resume feeding as normal.
Read also:
- Taking Care of my Sourdough Starter (Coming Soon)
- Tips for making my Sourdough more Sour (Coming Soon)
#4 – Is Sourdough healthier than regular bread?
The short answer: YES
True Sourdough bread is a fermented product which means that nature (in the form of wild yeast) has done most of the processing for you!
The real question is, how MUCH healthier?
It is not a probiotic or a live food (because everything is killed off in the baking process) but it definitely provides a bread that is much more gentle on the gut than any commercially yeasted product. This is why many people who are “gluten intolerant” can often enjoy sourdough. (This is not the case for people who suffer from Celiac disease.)
The fermentation process also “unlocks” the proteins in your flour and helps your body to really absorb all the nutrients from your grains, even going so far as to help your body process the bread more as a protein (similar to a legume) than a carbohydrate.
Obviously, fermentation cannot make up for the nutrients removed from your grains prior to baking (ie. white flour vs. whole wheat/spelt/rye) but you can definitely introduce whole grain flours into your breads or even your starter to increase nutrient content.
For more information on this, read: Sourdough Bread Health Benefits
#5 – Why are the bottom of my loaves burning?
Short answer: They are touching the heat source
There are several solutions:
- As soon as you put your loaves in the oven, diffuse the heat going directly to the bottom of the loaf – ie. put a cold baking stone or baking sheet on the rack only one notch lower than your dutch ovens or pans (this advice is for preheated dutch ovens only)
- Use the bottom of a springform pan, or a round cooling rack covered with parchment paper inside your Dutch Oven to create a little barrier between the loaf and the pan.
- Put cornmeal on the bottom of your pan before dropping in your loaf
- Once you are able to remove the lid from your Dutch Oven, also remove the loaf from the pan and place it to finish browning directly on the oven rack. (This is easier if you line your DO with parchment paper when you bake)
*Note* – Using Parchment paper alone does not prevent burning.
Read also:
#6 – Why are my loaves gummy?
Yes, I know they are still delicious and you probably eat them with pride, but do they have to be that way?
Short answer: Nope 🙂
You probably have 1 of 3 problems:
- You didn’t form enough gluten – meaning you probably went directly from mix to rise to bake… or used a low/no gluten flour. Gluten formation holds the bubbles that make your bread light and airy. So, those stretch and folds / coil folds / slap and folds, etc are a little bit important 😉 . It is also critical to allow the dough to rest in between steps. Resting also helps dough form gluten.
- You underproofed your bread – Underproofed bread is hard to bake properly and typically comes out extremely dense. See: How to Maximize my Oven Spring for more info.
- You cut into it too soon. I know, the temptation is VERY hard to resist, but your bread and your fingertips will thank you. Bread continues to finish cooking after it is removed from the oven for about 1 hour. If you pay close attention you will notice that even the crust gets a little softer since it is being steamed from the inside.
#7 – How can I avoid the sourdough “MESS”?

People have a problem with the wetness of sourdough dough. I hear lots of stories of people trying to do the slap and fold method and ending up with cement splatter all over their walls. We also have problems with overflowing starters, flour everywhere, and solidified papier-mâché globs all over every bowl in the kitchen.
Please don’t freak out.
I used to hate everything related to baking because of the mess. But, I started sourdough precisely because I felt like it was less mess. Granted, that doesn’t necessarily have to be entirely true. BUT, once you get a system down, I promise, it feels like no mess at all!
If this is your problem, the first thing you need to do is get a dough scraper, and then check out my post on How to Avoid the Sourdough Mess.
#8 – How do I keep my dough from sticking to the proofing baskets or towel? What do I do if my dough sticks?

This was a major “Aha” moment for me when I started my sourdough journey. Let me tell you, this whole process is WAY more fun when your dough doesn’t stick 🙂 And the best news is, it doesn’t have to!
- Make sure you season your basket or towels with RICE flour. – Rice flour absorbs more moisture content than regular flour and does wonders for sticky dough. Once I switched I have never once had a problem with my dough sticking.
- “Seasoning your basket” just means:
- spray down your basket or the center of your towel with clean water in a spray bottle
- sprinkle generously with rice flour
- shake it around to make sure the damp area is evenly coated, and
- allow it to dry completely before using.
- “Seasoning your basket” just means:
- Use Flour Sack Towels. These are inexpensive, special, lint free towels whose texture lends them to being better for non-stick purposes. Regular kitchen towels have too many nooks and crannies that make them too hard to flour properly and stick too much…. not to mention, now your kitchen towel is covered in cement. Yuck!
- If your dough sticks, just let it dry and peel off the large chunks of dough. Then just re-season the towel.
#9 – Do I have to use suggested tools? Ex. a Dutch Oven or a scale?
Well, technically no, you don’t HAVE to do anything, and there are work-arounds for everything. But, they are definitely suggested for a reason.
The Dutch Oven
is primarily recommended for capturing steam and providing a close and even heat source all around your bread. For beginners, it will DEFINITELY give the best results.
That said, you can create steam by other methods. For example:
- using any ovensafe pot with a cover (including pyrex, stoneware, or two loaf pans stacked on top of each other)
- baking on a stone covered by an inverted oven safe pot, or
- introducing lots of steam with lava rocks, boiling water, or ice cubes.
The Kitchen Scale
is recommended to achieve consistent results and/or know which variables are affecting your bread results. Different flours have different weights and some might be more compressed than others. Since the hydration level of sourdough bread is an extremely important factor in your perfect loaf, this is very important, especially considering the fact that water weighs much more than flour.
Eventually, if you bake often enough you will probably get to the point with your dough where you can easily measure quantities by touch or by “eyeballing it”… but, until you already have the feel for the dough, it is almost impossible to describe. I definitely do not recommend this method for beginners, or for anyone who is attempting to troubleshoot their results.
#10 – I don’t understand Baker’s Percentages! Help!
Are Baker’s percentages important? What are they for?
They are to help bakers make as much dough as they want, as many loaves as they want, or whatever size loaves they want with the exact same recipe. It is a little frustrating for beginner bakers because you may not understand know how to use them.
My AH-HA moment with Baker’s Percentages was that the quantity of FLOUR equals 100%.
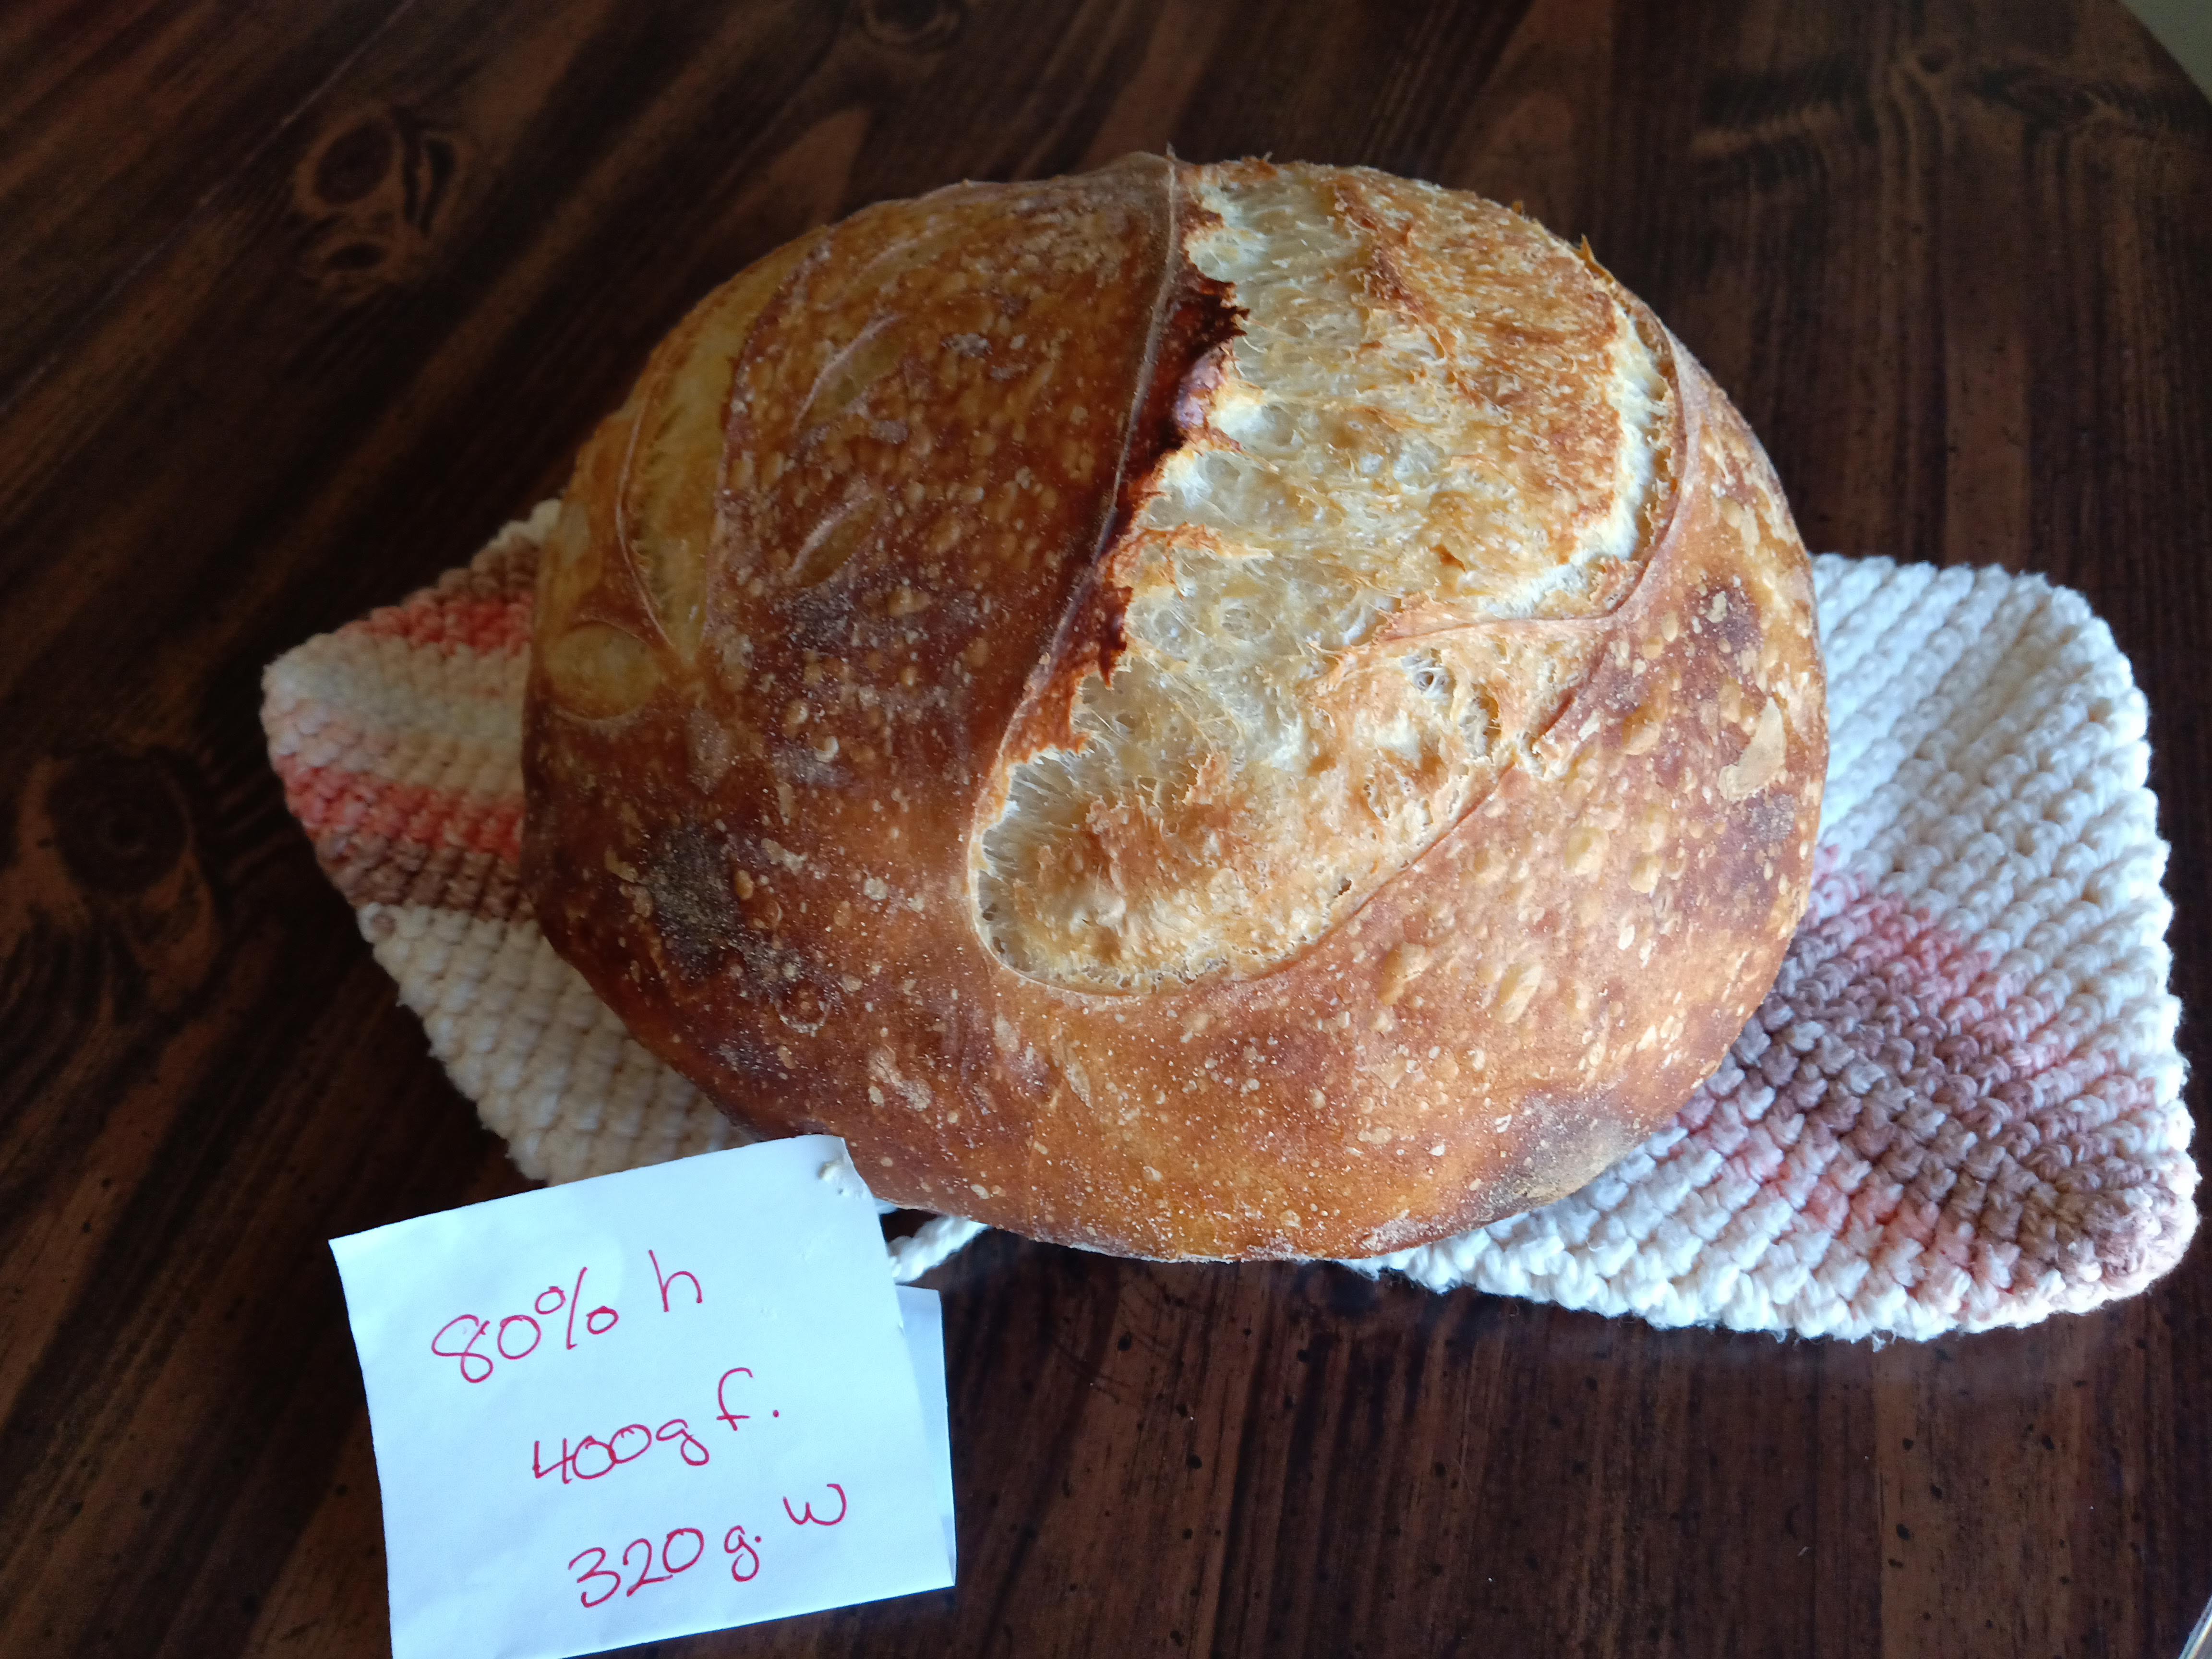
For example, when I make 2 large loaves at a time, I can use 1000g flour (whatever mix of flours I want) and that is “100%”. Dough that is 80% hydration would be using 800g water. 75% hydration dough = 750g. If I was going to use 20% starter in this recipe, it would be 200g.
Starter that is 100% hydration = equal parts (by weight) flour and water.
Some bakers get extra fancy-schmancy and precise with their calculations and include the starter in their calculations, but in my opinion, that just makes the numbers get WAY more complicated. As long as you are using the same amount of starter each time, your results will be consistent, whether your final exact percentage was 76.4% or 73.2%.
Here is a link to a good Baker’s Calculator if you are looking for serious precision and seem to be having trouble with your calculations.
Or check this one: Sourdough School: Sourdough Hydration Calculator
BONUS – My dough has X,Y,Z problem – WHAT DID I DO WRONG!?
This problem is so common and there are so many variables to consider that it is difficult to give a direct answer. However, I have created a handy-dandy troubleshooting guide for beginning bakers to help you reach those Ah-ha moments much faster (so it doesn’t take you 2.5 years, like it did me 🙂 – Don’t judge! I have 5 kids, I have a good excuse for being slow!)
Sign up below to get the free printable if you are wondering why your loaves are flat, dense, dry, burnt, soupy, messy, mishappen, or just not as exciting as you wish they were, to get all your answers!
Are there any other Sourdough FAQs I should add here? Did I miss something?
Please share your thoughts below to help me give you the best Sourdough Troubleshooting Guide out there!
Til next time!
Happy Baking!
4 responses to “Simple Answers to the Top 10 Sourdough FAQs”
Hi Greetings from Australia, I have just found this page, and I would love to get a copy of Your Master Recipe but I cannot find it anywhere, can you help me please. I love your clear explanations and today I got really good blisters on my loaf, and I could see them in the dough before going into the oven. I have often wondered why I don’t always get blisters on my loaves but today I learned why. Where would I find your Master Recipe so I can give it a go.
This recipe looks awesome!!! Since I don’t use grain flour, do you think almond or coconut flour would work well as a substitute? Thanks!
It is definitely possible to use non gluten flours for sourdough but since I don’t use them personally I don’t know how they would respond to this recipe. Might I suggest gfjules.com recipe?? https://gfjules.com/recipes/gluten-free-sourdough-bread-recipe/
To be perfectly honest, I don’t do gluten free sourdough. I know that it is possible but I’m unfamiliar with the process. Maybe check out https://www.victoriaannmeyers.com/blog/2019/3/15/gluten-free-sourdough-for-real-life-people